Never underestimate the power of the purge.
For the past two years, our laundry room had been a sad black hole where everything went to hide. It became the biggest catch-all, my vice, an embarrassment. The open shelves were old, dirty and collected way too much crap. I so desperately wanted to minimize the amount of stuff we had in there, making it cleaner, brighter, and more functional. So that’s exactly what we did.
At 9pm on a Tuesday I found myself holding a sledgehammer. Isn’t that how all good stories start?
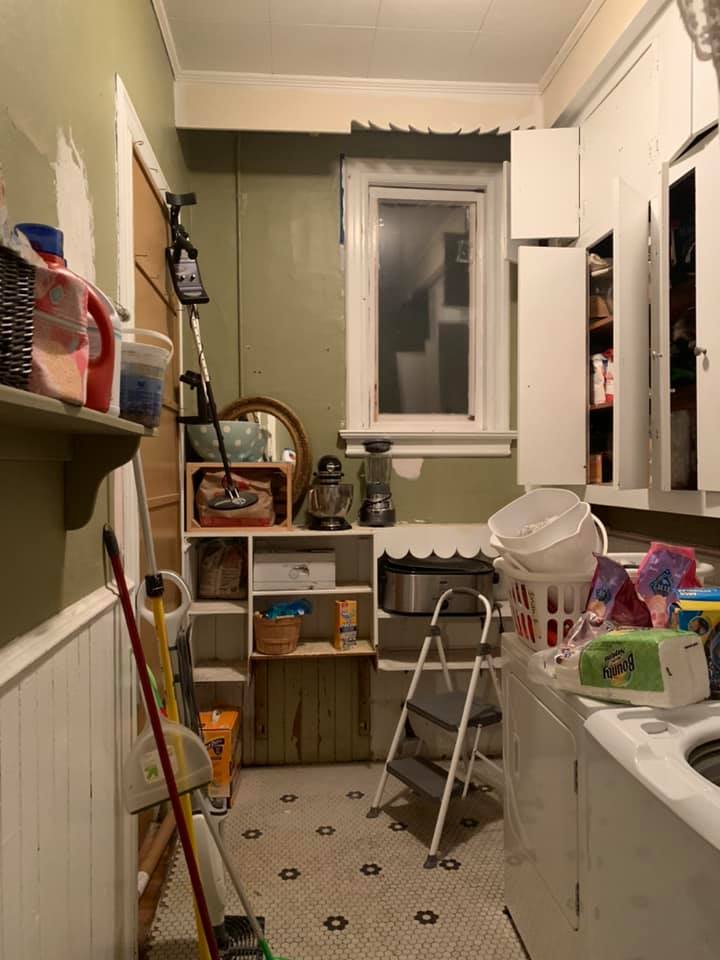
Before 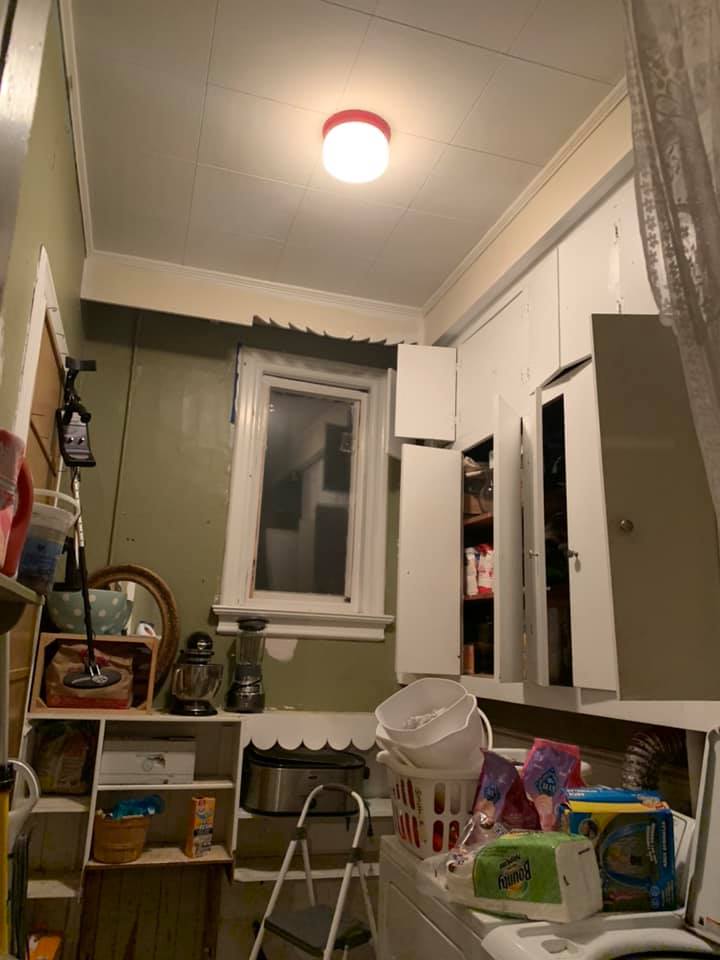
Before 
Before 
Before
As you can see, the original plaster was patchy and cracking in some places, and the lower wainscoting was in rough shape. Now, obviously, when our house was built in 1887 there was no indoor plumbing so this space was not always a laundry room. It was, actually, a butler’s pantry. That brown doorway you see actually used to be a swinging door into our dining room. Who knows when this room was converted- or even what it was before it was a laundry room- but we believe the shelving, carved trim work, and wainscoting were put in sometime in the 40’s.
Firstly, we took out the shelves and skim coated the old walls with joint compound (where repairs were needed). Then we got to replacing the wainscoting with fresh beadboard.

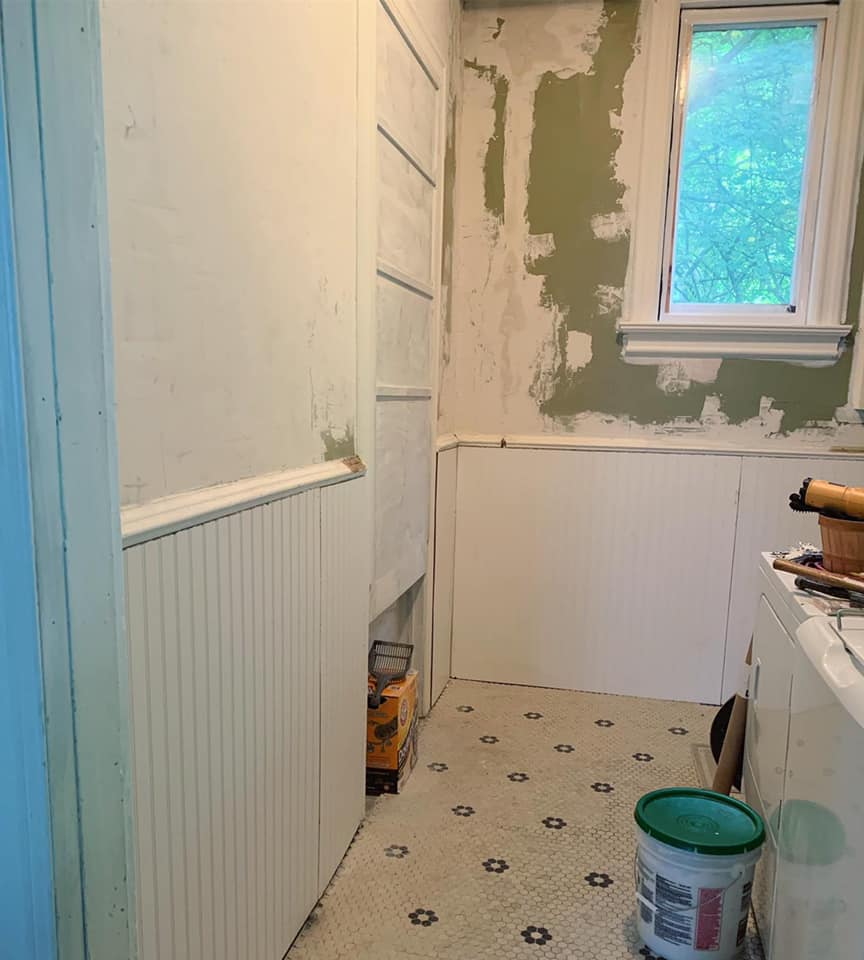
This was the project that made us realize we needed a nail gun. Have you ever tried to nail in beadboard and then baseboards with finishing nails? I had lost feeling in my fingertips by the end of it all.

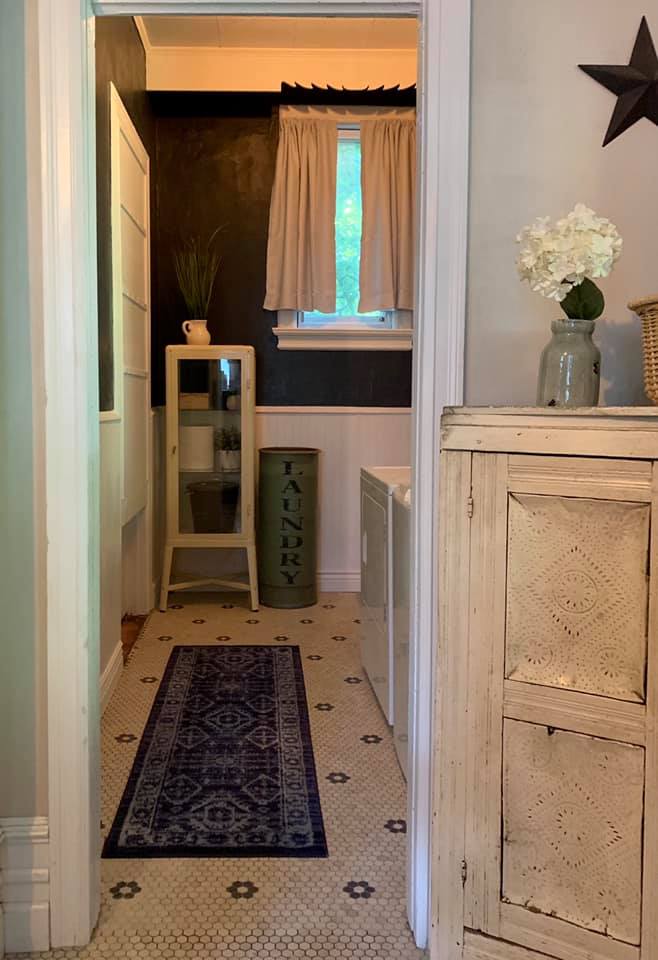
Once I regained feeling in my hands, I took to painting the walls. I wanted to go with a really deep, bold, moody color. I went with Sherwin-Williams ‘Hematite’ and it was exactly what I wanted. While the paint dried and I caulked baseboards and trim, husband replaced the sad light fixture.
Et voila! A weekend laundry room refresh paid for with spare change!


PS- before I go, let me explain what I meant by that last comment. Yes, we funded this project entirely with spare change. A few months ago I signed up for an account with Qapital. What they do is round up every purchase and bill payment to the next dollar or two. (You determine the amount!) I sent my account to round up to every even dollar and within two months, I’d saved up $400 without even really noticing. It kind of felt like free money? This isn’t an ad or sponsored post from Qapital- it’s truly just a testimonial about something neat that worked for us. Maybe it will help you, too!
Have a question about our project? Sound off in the comments!
Til next time,
The Brick and Maple fam <3
